How To Make A Dormer Roof In Revit

Drawing A Dormer In Revit Youtube
Video Create A Dormer Revit Products 2019 Autodesk Knowledge Network

Dormer Roof Revit Architecture Revitfree Com Youtube

Revit Dormers And Roof Openings Cadclips Youtube

Adding Dormer Window To A Sloping Roof Youtube

Create A Dormer Opening In A Roof Revit Lt 2020 Autodesk Knowledge Network

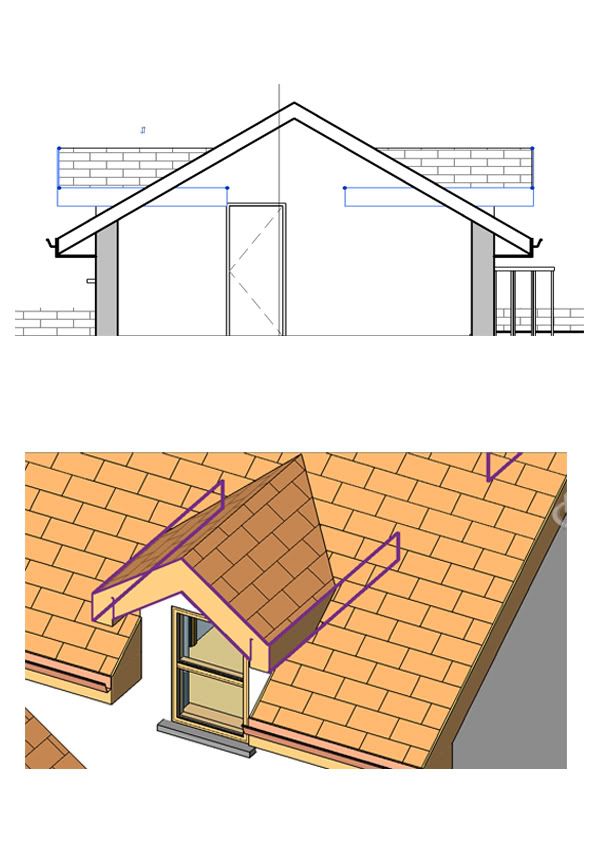
Move the walls to the dormer.
How to make a dormer roof in revit.

How To Create A Dormer In Revit Tutorial Youtube

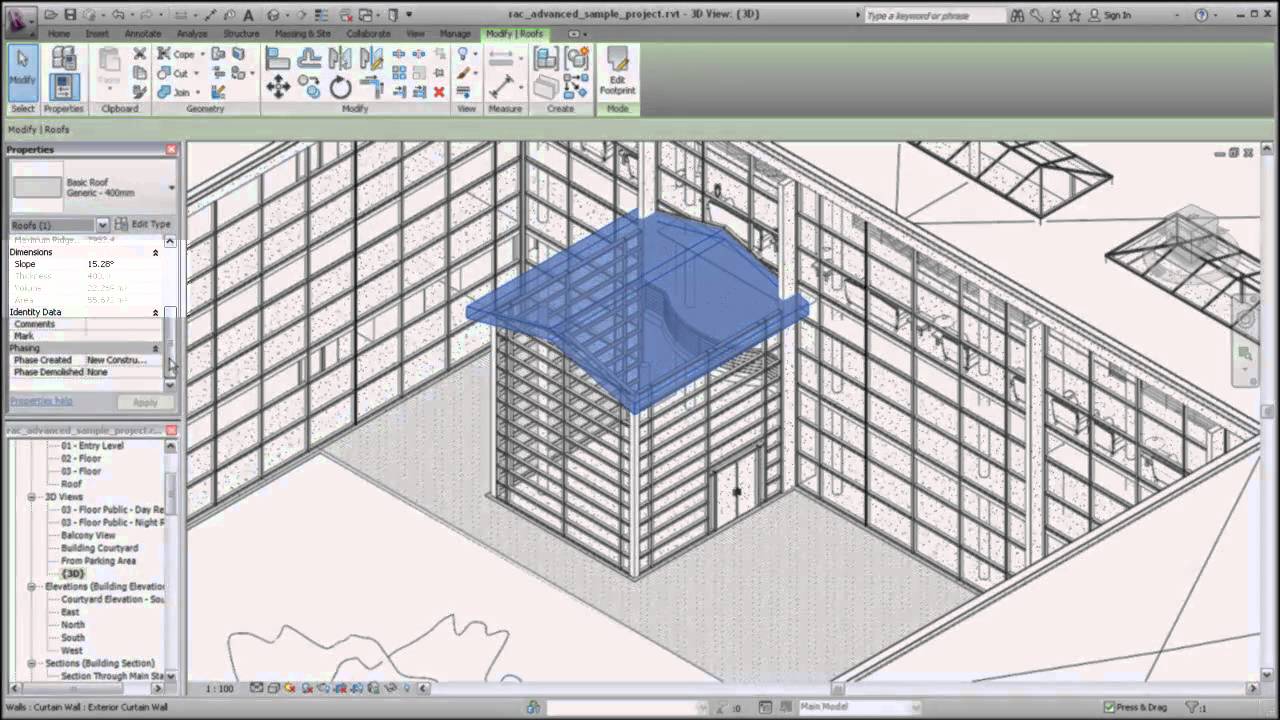
Revit Roof Slope Arrow

Cannot Get Dormer Roof To Join Main Roof Autodesk Community Revit Products

Revit Part 1 Architecture 2010 Sloping Eyebrow Dormer Cadclip Youtube

Dormer Roof Creation With Revit Architecture Youtube

Join Roof Extrusion To Roof By Footprint Autodesk Community Revit Products

Flat Roof Dormer On Revit 2014 Autodesk Community Revit Products

Creating Complex Roof In Revit Architecture Hip Roofs Youtube

Revit Roof Tip 9 Join Roofs Add Opening To Create Dormer Youtube

Revit Tutorials Roofs Youtube

Create A Dormer Opening In A Roof Revit Products 2018 Autodesk Knowledge Network

Dormers In Revit With Construction Roof Tutorial Youtube

9 Tips To Understand Revit Roofs Revit Pure

Dormers Revit Products 2019 Autodesk Knowledge Network
9 Tips To Understand Revit Roofs Youtube

Solved Single Wall Attach To Two Roofs Autodesk Community Revit Products

How To Create A Thatch Roof In Revit Micrographics

Cadclip Revit 2011 Roof Basics 06 Mansard Youtube
Https Encrypted Tbn0 Gstatic Com Images Q Tbn 3aand9gcrihythdijex S Yezovrmwldn3t17ztawvt Hk7pwl5l41euot Usqp Cau
.png)
Gable Wall Will Not Attach To Dormer Roof Autodesk Community Revit Products

Revit Tips Join Roof Dormer Opening Youtube

How To Create Roof Dormer In Revit 0016 Youtube
Autodesk Revit Architecture Creating A Sloped Roof Youtube
Augi Forums
Source : pinterest.com
