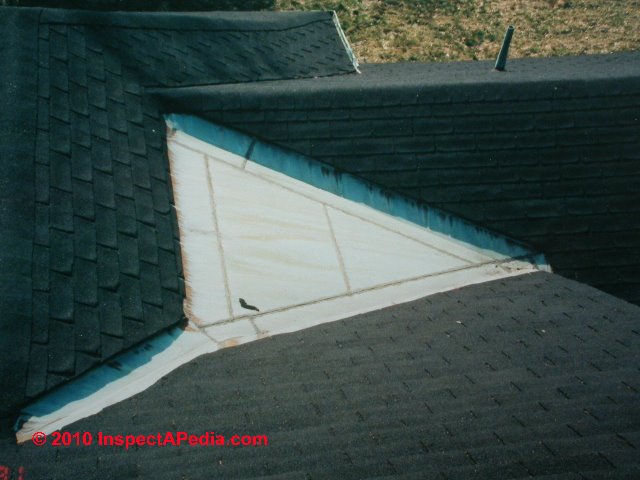
Installing Valley Flashing On Existing Roof

Tying A New Roof Into An Old One Fine Homebuilding Question Answer Building A House Roof Home Additions

Pin On Metal Roofing

Roof Installation How To Shingle A Valley Hd By Roofrepair101 Roof Installation Roofing Shingling

Pin On Roof
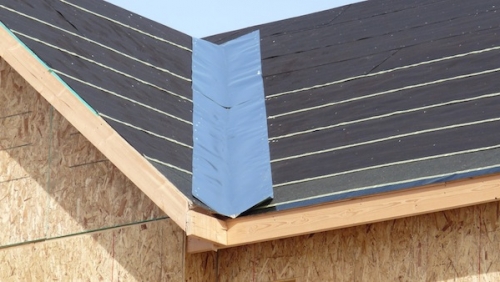
Roof Valley Flashing Specifications And Details

How To Build A Porch Screen Porch Construction Building A Porch House With Porch Screened In Porch

Snap a chalkline 2 to 3 inches past the valley center on the top layer of shingles.
Installing valley flashing on existing roof.

Subsequently Building A Supplementary House Or Retrofitting An Existing One Choosing The Right Type Of Roof Can Be Mo Diy Metal Roof Roof Installation Roofing
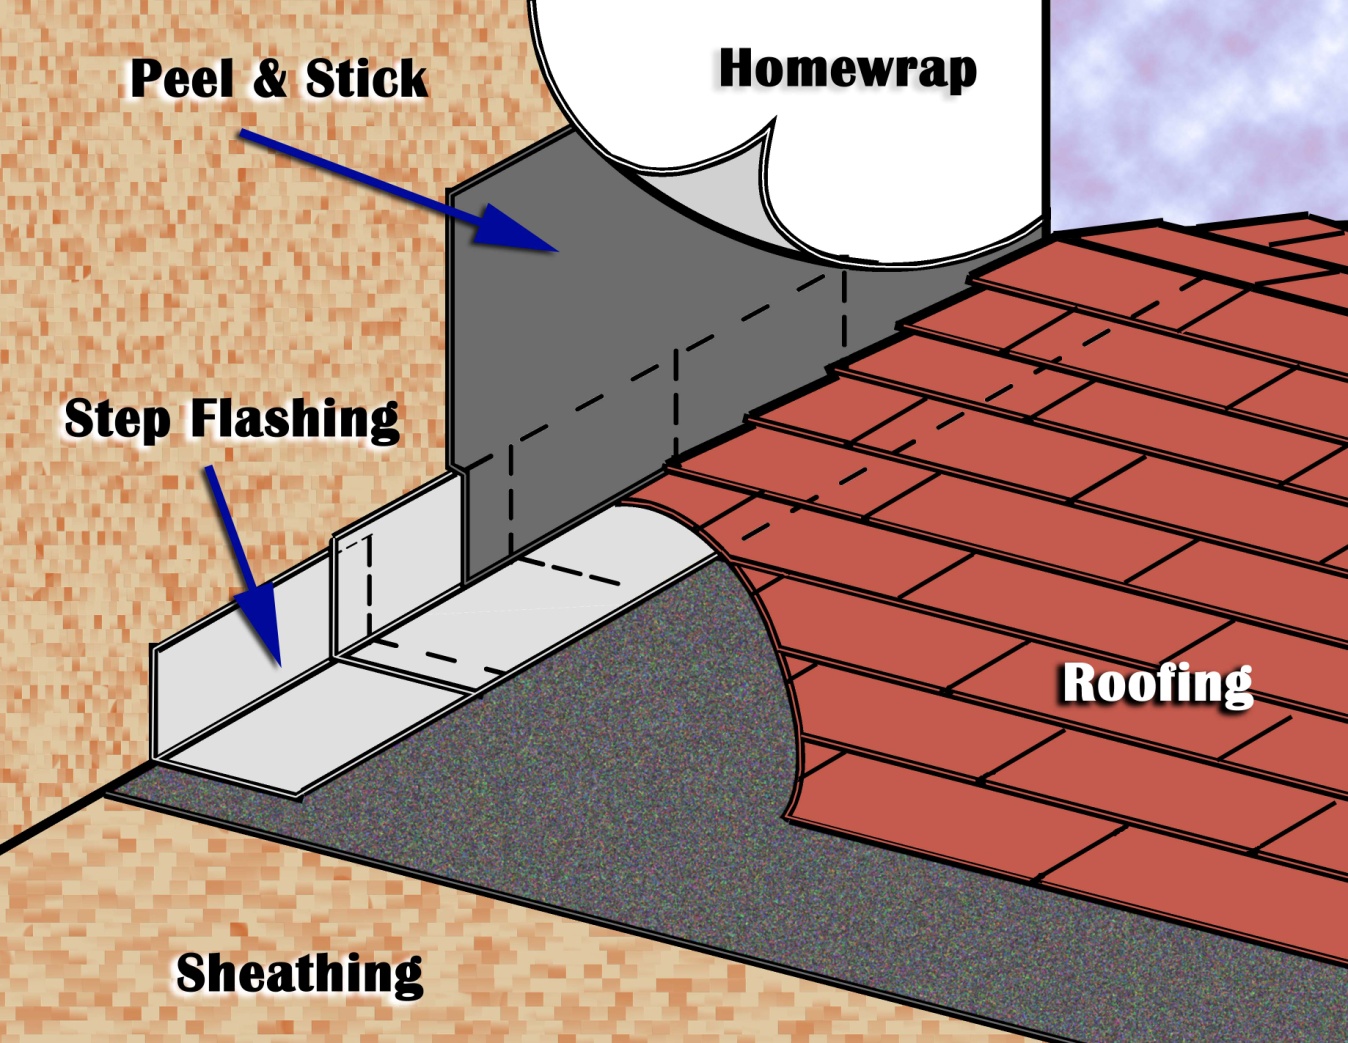
How To Install Roof Flashing On Different Structure Places
Pin On Roofs And Gutters

Open Valley Roof Flashing Youtube

Pin On Diy Outdoor Projects

Pin On Back Porch

How To Dry In A Roof Install Tar Paper When Replacing Roof Shingles Diy Roofing Roof Shingles Roof Eaves

Shingling A Valley Roof Repair Diy Roofing Roofing

Mastering Roof Inspections Flashing Part 5 Internachi

How To Roof A House Diy Roofing Home Maintenance Home Construction

Pin On Construction Details
How To Install Flashing On An Existing Roof

Pin On Roof

How To Shingle A Roof 90 Pics Pro Tips Recommendations Diy Roofing Roof Repair Roofing

Valley Flashing Two Valleys Run Together Roofing How To

Pin On Ideas For The House

Tool To Remove Panels Standing Seam Roof Metal Roofing Forum Metal Roof Panels Metal Roof Roof Panels
Roof Deck Valleys And Penetrations Sealed Building America Solution Center
Https Encrypted Tbn0 Gstatic Com Images Q Tbn 3aand9gctd Knwg9 Aqvxobeiwrmo Ycxevyvqv5dpu08wjq Qygicqy3m Usqp Cau

Pin On Construction Information

Solar Energy Installation Panel Roof Valley Rain Water Diverter Rain Diverter Roof Gutter Colors

Roof Doctor Inc Roofing Roof Design Roof Repair

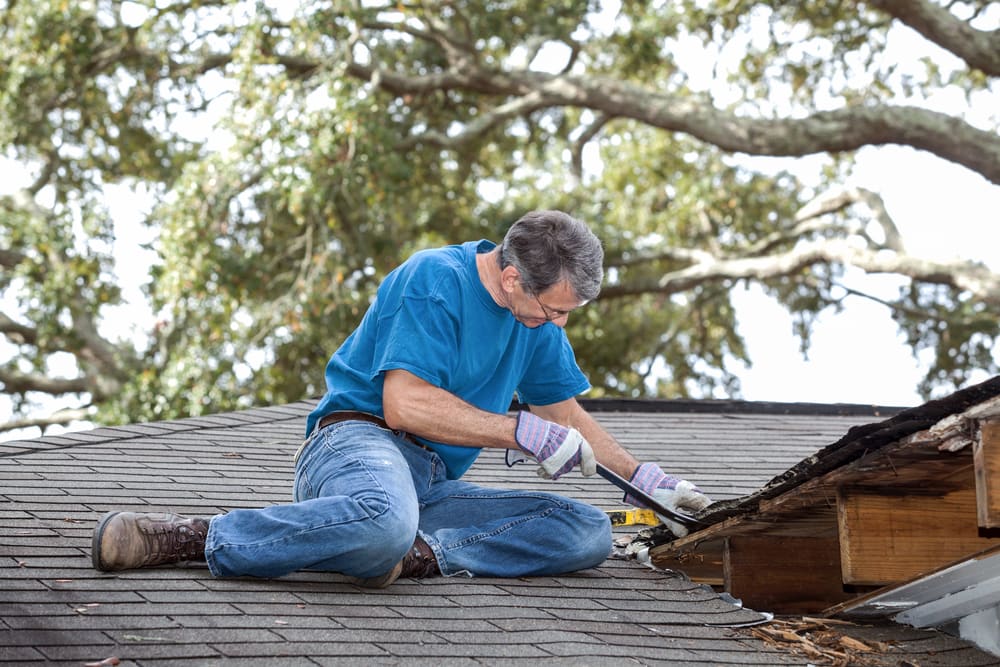
Roof Removal How To Tear Off Roof Shingles Diy Roofing Cool Roof

Pin On Chimney
Source : pinterest.com
